[Explored] How to Seal Door Threshold to Concrete?
Ever walked past your front door and felt a sneaky draft slither through the gap underneath? Or have you noticed a puddle mysteriously forming inside after a rainstorm? If you’ve nodded your head or muttered a frustrated “yes,” it’s high time to tackle the problem like a pro.
In this article, we’ll break down the art of sealing your door threshold to concrete. We will cover the materials you’ll need and how to do it in a proper manner so that your doors you can say bye-bye to drafts and hello to a more comfortable home.

When You Should Seal Your Door Threshold?
Below we have discussed when you should seal your door threshold so that you can decide for yourself whether or not you want to go with the process.
Advantage 1: Bye-Bye Drafts
Imagine your home as a cozy fortress. Now, picture drafts as sneaky invaders trying to infiltrate your castle. When you seal that threshold, you’re sending those drafts packing. No more chilly surprises!
Advantage 2: Keep the Wet Stuff Out
Rainstorms can be pretty dramatic, but you don’t need a mini-lake forming inside your house. Sealing your threshold means saying sayonara to unwelcome puddles. Your floors will thank you.
Advantage 3: Keep the Bugs at Bay
Bugs and pests are like party crashers you didn’t invite. But an unsealed threshold is like leaving the front door wide open for them. Seal it up, and you’ll have a bug-proof barrier.
Disadvantage 1: Aesthetic Hiccups
Sometimes, sealing a threshold might not look as sleek as you’d like. But hey, function over form, right? If aesthetics are a big concern, choose a threshold seal that blends in.
Disadvantage 2: Tricky Business for Newbies
If you’ve never done it before, sealing a threshold might feel a bit intimidating. But fear not, we’ll walk you through it step by step.
Sealing Door Threshold to Concrete
Now that you have decided to seal the threshold of your door, it’s time to start with the job. But before that, make sure that you have the following materials handy.
Materials You’ll Need
Before you embark on this journey, gather your supplies:
- Door Threshold or Door Sweep (if you don’t have one): You can purchase these at most hardware stores. They come in various sizes to fit your door.
- Silicone or Polyurethane Caulk: Make sure it’s suitable for outdoor use and concrete. This type of caulk is weather-resistant and durable.
- Caulk Gun: This tool makes it easy to apply a smooth, even bead of caulk.
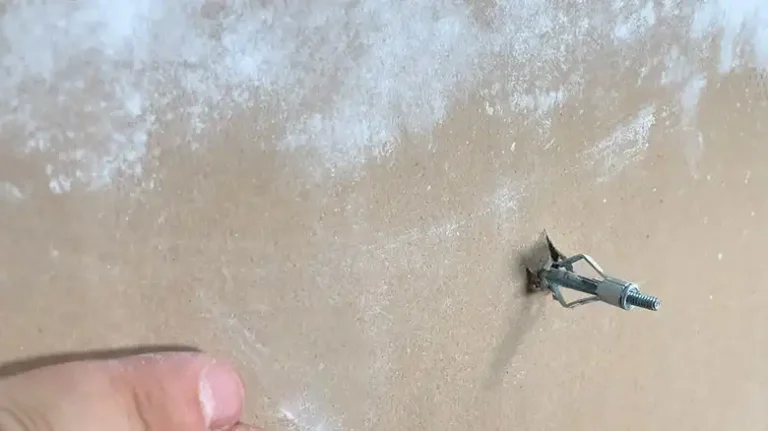
- Utility Knife: You’ll use this to remove any old caulk or debris from the threshold.
- Sandpaper: Rough up the concrete surface slightly to help the caulk adhere better.
- Rubbing Alcohol or Acetone: Clean the concrete thoroughly to ensure a strong bond with the caulk.
- Rag or Paper Towels: Use these to wipe away excess caulk and for cleaning.
- Painter’s Tape (Optional): If you want a clean finish, painter’s tape can help keep the caulk where it belongs.
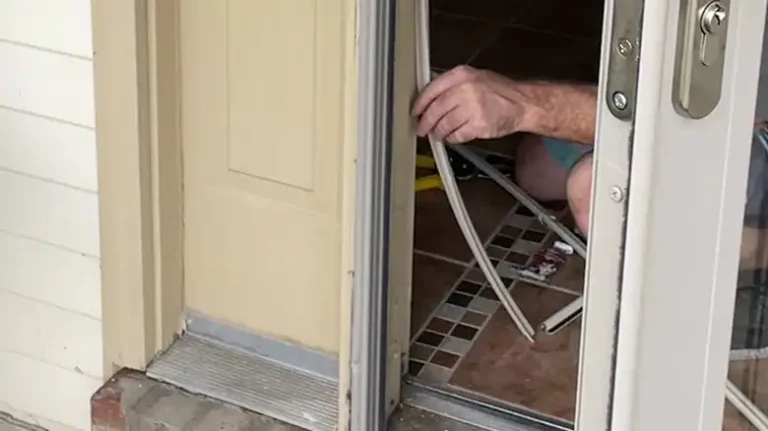
How to Prepare the Threshold
Now that you have gathered the materials, it’s time to prep the threshold. Here’s how to do it:
Clean It Up
Use your utility knife to carefully remove any old caulk or debris from the gap between the threshold and the concrete. A clean surface ensures a better seal.
Prep the Concrete
Sand the concrete surface around the threshold to remove any rough or uneven areas. This helps the caulk adhere more effectively.
Clean the concrete thoroughly with rubbing alcohol or acetone to remove dirt, dust, and grease. A clean surface ensures better adhesion.
Mask It (If You Want)
If you’re aiming for a pristine finish, apply painter’s tape to the edges of the threshold and the concrete. This will prevent caulk from spreading where you don’t want it.
Add Some Finishing Touches
Apply the Caulk
Load your caulk gun with the silicone or polyurethane caulk.
Cut the tip of the caulk tube at a 45-degree angle, with the size of the cut tip matching the size of the gap between the threshold and the concrete.
Start applying a continuous bead of caulk along the entire gap. Make sure the caulk fills the space completely. For added durability, consider slightly overfilling the gap.
Smooth It Out
Use a moistened finger or a caulk smoothing tool to press and smooth the caulk into the gap. This ensures a good seal and a neat appearance.
Remove any excess caulk as you go to maintain a clean finish.
Clean Up the Mess
Wipe away any extra caulk immediately using a rag or paper towel. You don’t want a sticky mess drying on your threshold.
Let It Dry
Now, the waiting game begins. Allow the caulk to dry according to the manufacturer’s instructions. This typically takes a few hours to overnight, depending on the product and environmental conditions.
Test the Seal
Once the caulk has dried, give it a test run. Open and close your door to make sure it seals tightly, and there are no drafts or gaps.
Remove Masking Tape (If You Used It)
If you used painter’s tape, carefully peel it away to reveal your handiwork. Be gentle to avoid damaging the caulk.
Maintenance
Good news: Your newly sealed threshold doesn’t require much TLC. Just keep an eye on it for any signs of wear or damage. If you spot any issues, reseal as needed. It’s an easy fix!
FAQ – Frequently Asked Questions and Answers
How long does it take to seal a threshold?
The actual sealing process can be done in less than an hour. The drying time for the caulk varies but is typically a few hours to overnight.
Can I use regular caulk for this?
It’s better to use silicone or polyurethane caulk suitable for outdoor use and concrete. They provide a more durable seal.
Do I really need to mask off the area with painter’s tape?
It’s not mandatory, but it helps create a cleaner finish and prevents caulk from spreading where you don’t want it.
Will sealing the threshold affect the appearance of my doorway?
It might not look as sleek, but the benefits far outweigh any minor aesthetic changes. Plus, you can choose caulk that blends in.
Final Thoughts
Sealing your door threshold to concrete is a DIY project that can make a big difference in your home’s comfort and efficiency. It’s not too difficult, and the benefits are well worth the effort. So, go ahead and seal the deal, and say goodbye to drafts, puddles, and unwanted guests in your home!

![[Answered] Can Door Knob Be Used Outside?](https://doorsuggest.com/wp-content/uploads/2023/09/Can-Door-Knob-Be-Used-Outside-768x431.webp)