How Long Does It Take To Paint a Door? Comprehensive Guide for You
If you’ve ever gazed at your weather-worn front door, dreaming of a fresh coat of paint to spruce things up, you’re not alone. A beautifully painted door can instantly boost your home’s curb appeal. But before you dive into this DIY project, you’re probably wondering how long it may take to paint a door.
On average, it takes about 2 to 5 hours to paint a door from start to finish. This includes prep time, painting, and drying. However, the specific duration can vary based on several factors. Now, if you’re thinking, “That’s not too bad!” — hold your paintbrush! Remember, this is just the average. Your individual circumstances can speed up or slow down the process.
Therefore, we’re here to get you covered with all the details you need, from prep to drying time and everything in between. All you need to do is take a few minutes and keep reading the article till the end. So, without wasting any time, let’s get into the details straightforwardly!
How Long It May Take to Paint a Door?
The time required for painting a door is influenced by various factors, such as the door’s dimensions, its current state, the type of paint employed, and your level of expertise. As a general guideline, door painting can span anywhere from a quick 2-hour task to a more extensive 1-day project.
Should you be tasked with painting an interior door using just a single coat of paint, you might wrap up the job in as little as 2 hours. However, if you find yourself working on an exterior door that demands multiple layers of paint, or if the door is in a deteriorated condition, it’s prudent to allocate up to a full day to ensure a thorough and well-executed result.
Factors That Influence Painting Time
When it comes to the question of how long it takes to paint a door, several pivotal factors come into play. Understanding these variables can help you plan your door-painting project more effectively.
1. Door Material
Wooden doors may require more time due to sanding and priming, while metal or fiberglass doors can be faster to paint.
2. Color Change
If you’re changing the color drastically, you might need additional coats, which means more time.
3. Weather Conditions
Humidity and temperature can affect drying times. It’s best to paint on a dry, mild day.
4. Type of Paint
Oil-based paints take longer to dry than water-based ones.
5. Prep Work
Properly preparing the surface—sanding, filling cracks, and using primer—adds to the timeline but ensures a better finish.
6. Drying Time
Each coat of paint needs to dry before the next. Patience is key!
Bonus Tips for Speeding Up the Painting Process with Steps
Now that you know about the influencing factors, it’s time to step into the actual process. When it comes to painting a door, the process can be both satisfying and transformative. To ensure a professional finish, follow this step-by-step guide –
Step 1. Gather Your Tools and Materials
Before you start, ensure you have all the necessary tools and materials.
- Paint: Choose a high-quality exterior paint in your desired color. Consider the door material and weather conditions when selecting the paint type.
- Paintbrushes: Invest in a good quality paintbrush for smooth application. A 2-inch angled brush is ideal for doors.
- Sandpaper: Get medium-grit sandpaper (around 120-grit) to sand the door’s surface.
- Drop Cloths: Cover the surrounding area with drop cloths or newspapers to catch any paint drips.
- Painter’s Tape: Use painter’s tape to mask off any areas you don’t want to paint, such as hardware and windows.
- Wood Filler: If your door has imperfections like dents or holes, have wood filler and a putty knife handy.
- Screwdriver: You may need to remove the door hardware, so keep a screwdriver nearby.
- Primer (if needed): If you’re changing the door’s color significantly, using a primer is recommended.
Step 2. Prep the Door
Proper preparation is crucial for a professional-looking finish.
Remove Hardware — If possible, remove the door from its hinges. If not, remove the hardware like knobs, handles, and locks.
Sand the Surface — Use the sandpaper to lightly sand the entire surface of the door. This step helps the paint adhere better and ensures a smooth finish. Pay special attention to any rough or peeling areas.
Fill Imperfections — If your door has dents or holes, use wood filler to patch them up. Apply the filler with a putty knife, let it dry, and then sand it smooth.
Clean the Door — Wipe down the door with a damp cloth to remove any dust or debris from sanding. Allow it to dry completely before moving on.
Step 3. Prime the Door (if needed)
If you’re changing the door’s color significantly or if it’s bare wood, applying a primer is a good idea. Primer creates a stable base for the paint and helps it adhere better.
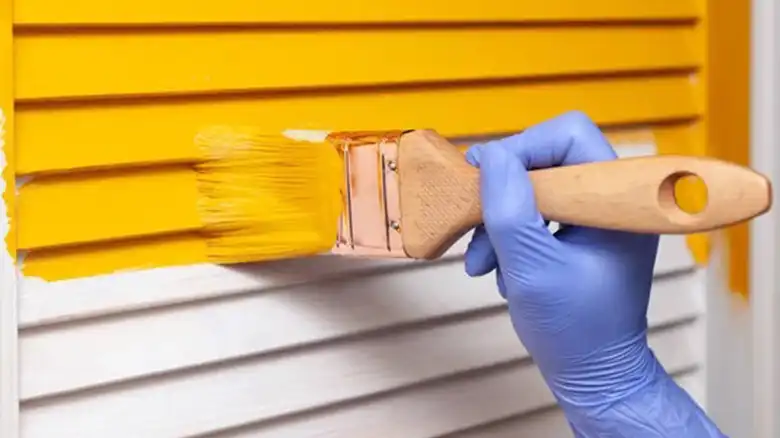
Step 4. Painting Time
Now it’s time to apply the paint.
Start with Edges — Begin by painting the edges of the door with a paintbrush.
Paint Panels and Recessed Areas — Next, paint any panels or recessed areas on the door. Use the brush for this detailed work.
Paint the Rest — For the flat, larger areas of the door, you can use a roller or a larger paintbrush. Apply the paint evenly in long, smooth strokes, following the grain of the wood if it’s a wooden door.
Apply Thin Coats — It’s better to apply multiple thin coats rather than one thick coat. Allow each coat to dry completely before applying the next (usually 2-4 hours, but check the paint can for specific drying times).
Paint the Other Side — Once the front side is dry, flip the door and repeat the process on the other side.
Step 5. Dry and Reassemble
Give the door ample time to dry. It’s best to let it dry overnight to ensure a solid, long-lasting finish. Once the paint is completely dry, reattach the door hardware if you removed it. Be gentle to avoid damaging the fresh paint.
That’s all!
Common Related Questions
How do I choose the right paint for my door?
Selecting the right paint for your door is crucial for a successful project. To get it done properly, you need to consider these factors – Type of door material, climate conditions, color, sheen, etc.
Can I skip sanding and priming?
While it might be tempting to skip these steps, proper preparation is essential for a long-lasting, professional finish. Sanding smooths the surface, allowing the paint to adhere better. Priming creates a stable base and helps prevent color bleeding, especially when changing the door’s color significantly.
Can I paint my door in cold or rainy weather?
Painting in extreme weather conditions is not advisable. Ideal painting conditions are on a dry, mild day with temperatures between 50°F (10°C) and 85°F (30°C). High humidity or rain can interfere with the drying process and affect the quality of the finish.
Should I remove the door or paint it in place?
If possible, it’s recommended to remove the door from its hinges. This allows you to paint it horizontally, preventing drips and achieving a smoother finish. However, if removing the door is not feasible, you can paint it in place, but be extra careful to avoid drips and runs.
How can I prevent paint from sticking to the weather stripping?
To protect the weather stripping from paint, use painter’s tape to carefully mask off the area around it before you start painting. This will ensure that the weather stripping remains clean and functional.
Can I use a paint sprayer for my door?
Yes, you can use a paint sprayer for your door, and it can provide a smooth finish. However, be sure to follow the manufacturer’s instructions for your specific paint sprayer model. Proper masking and covering of nearby surfaces are essential to avoid overspray.
Closing Remarks
In conclusion, painting a door typically takes 2 to 5 hours, but this can vary due to factors like door material and color change. Following our step-by-step guide ensures a professional finish. Let the paint dry overnight for the best results and enjoy your transformed entrance.
Now, it’s your turn to add a splash of color to your life. If you have any more questions or need guidance, feel free to drop them in the comments below. Happy painting! 🎨🚪
![[5 Solutions] How to Fix a Pocket Door That Rubs?](https://doorsuggest.com/wp-content/uploads/2023/09/How-to-Fix-a-Pocket-Door-That-Rubs-768x431.webp)