How to Adjust Norton Door Closer: A Step-by-Step Guide
Have you ever faced the infuriating challenge of a door that seems to have a mind of its own? You know the one – it slams shut when you wish it wouldn’t and never closes completely when you want it to. Well, don’t worry as we’re here to unravel the secrets of Norton door closers and show you how to tame those rebellious doors.
In this step-by-step guide, we’ll demystify the art of adjusting Norton door closers, empowering you to regain control over your entrances and exits. Whether you’re a homeowner looking to enhance safety and convenience or a business owner seeking to optimize the functionality of your commercial doors, we’ve got you covered.
So, if you’re ready to bid farewell to the door drama and ensure your doors behave just the way you want them to, keep reading. We’re about to embark on a journey that will make you the master of your doors, one adjustment at a time!
Importance of Adjusting Norton Door Closers
Before we dive into the nitty-gritty of adjusting your Norton door closer, let’s talk about why it’s essential. A properly adjusted door closer offers several benefits:
Safety: A door that closes too quickly can be a hazard, potentially injuring someone. Conversely, a door that doesn’t close completely can compromise security.
Energy Efficiency: A well-adjusted door closer ensures that the door seals tightly, preventing drafts and saving on heating or cooling costs.
Longevity: Regular adjustments can extend the life of your Norton door closer, reducing the need for costly replacements.
So, how do you go about making these crucial adjustments? Let’s find out!
How Do You Adjust a Norton Door Closer?
When it comes to maintaining the functionality of your doors, knowing how to adjust a Norton door closer can prove invaluable. These devices, commonly found in commercial and residential settings, control the closing speed and force of doors, ensuring both safety and convenience. Now that you know its importance, let’s start the adjusting procedure from the very beginning.
Tools You’ll Require
Before you start the adjustment process, gather the necessary tools –
- Screwdriver: You’ll need a Phillips-head screwdriver for most adjustments.
- Hex Key (Allen Wrench): Some Norton door closers may require this for fine-tuning.
- Tape measure (If needed)
Step-by-Step Guide to Adjusting Norton Door Closer
Do you have the tools? Great! Now it’s time to get into the step-by-step process straightforwardly.
Step 1: Identify the Type of Norton Door Closer
Norton manufactures various types of door closers, each with its unique adjustment mechanism. Consult the manufacturer’s instructions or website to identify the specific model you have.
Step 2: Locate the Adjustment Screws
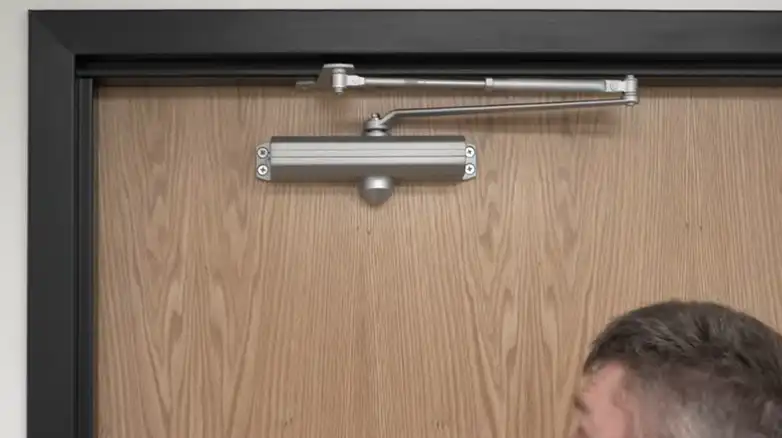
In most cases, you’ll find two key adjustment screws: one for controlling the closing speed and another for latch speed. These screws are typically located on the door closer’s body or arm.
Step 3: Adjusting Closing Speed
To adjust the closing speed, turn the appropriate screw clockwise to increase the speed or counterclockwise to slow it down. Make small adjustments and test the door’s closing speed until it suits your needs.
Step 4: Adjusting Latch Speed
Similar to the closing speed adjustment, use the designated screw to control the latch speed. A slower latch speed can prevent the door from slamming shut, providing a more controlled close.
Step 5: Testing the Door
After each adjustment, open and close the door to ensure it operates smoothly and safely. Make further adjustments as needed until you achieve the desired result.
Step 6: Fine-Tuning
For precision adjustments, you may need to use a hex key to fine-tune the door closer. Refer to the manufacturer’s instructions for specific guidance on this step.
End Note
Lastly, it can be said that adjusting your Norton door closer can improve safety, energy efficiency, and the overall functionality of your door. With the right tools and our step-by-step guide, you can tackle this task like a pro. Say goodbye to unruly doors and hello to a more comfortable and secure living space. Remember, a well-adjusted door closer is the key to a happier home.
Thank you for reading our guide on adjusting Norton door closers. If you have any more questions or need further assistance, please don’t hesitate to reach out to us. Your safety and convenience are our top priorities!
Relevant Questions
1. How often should I adjust my Norton door closer?
Ideally, you should check and adjust your Norton door closer every six months to a year to ensure it functions correctly. However, if you notice any issues, such as slamming or incomplete closures, address them promptly.
2. Can I use a screwdriver to adjust the door closer?
Yes, you can use a Phillips-head screwdriver for most adjustments on a Norton door closer. However, some models may require a hex key (Allen wrench) for fine-tuning.
3. Is it necessary to hire a professional for door closer adjustment?
Adjusting a Norton door closer can often be done as a DIY project if you’re comfortable using basic tools and following instructions. However, if you’re unsure or face difficulties, it’s advisable to consult a professional to avoid potential issues.
4. Can I adjust a Norton door closer to closing more slowly for accessibility?
Yes, you can adjust a Norton door closer to close more slowly, which can be beneficial for accessibility and safety. By turning the appropriate adjustment screw counterclockwise, you can reduce the closing speed to a more manageable rate.
5. What if my Norton door closer is leaking fluid?
If your Norton door closer is leaking fluid, it’s a sign of internal damage and should be replaced. Attempting to repair a leaking door closer is not recommended, as it may compromise its functionality and safety.
6. Are Norton door closers compatible with all types of doors?
Norton door closers are designed to be versatile and can work with a wide range of door types and sizes. However, it’s essential to ensure that the specific model you have is suitable for your door’s weight and usage requirements. Refer to the manufacturer’s guidelines for compatibility information.


![[Just 5 Steps] How to Measure for a Security Door?](https://doorsuggest.com/wp-content/uploads/2023/10/How-to-Measure-for-a-Security-Door-768x431.webp)